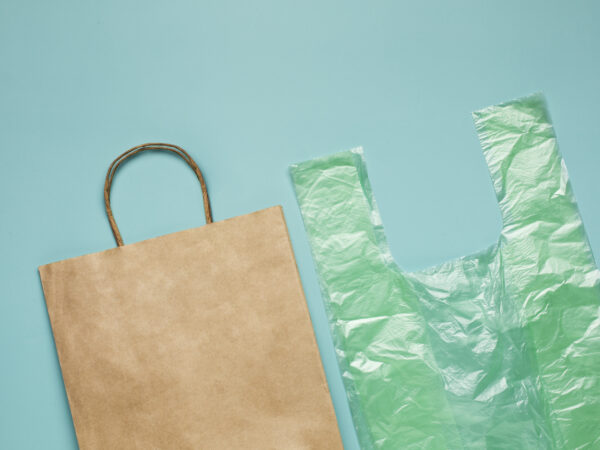
So, you’re thinking about making your own paper bags? Excellent choice! Not only are paper bags eco-friendly, but they also offer a fantastic canvas for customization. If you’re wondering where to start, you’re in the right place. In this guide, we’ll walk you through the first step in making a paper bag, especially focusing on die-cut techniques and customization options for those stylish custom paper bags with handles you’ve been eyeing.
Understanding Die Cut Paper Bags
Let’s begin by unraveling the mystery of die cut paper bags. Die cutting is a precise process used to create custom shapes and designs in paper. These shapes can range from simple to intricate, depending on your preference and the equipment available. For our paper bag project, die cutting plays a crucial role in determining the shape and structure of the bag.
The First Step: Designing Your Die Cut
Now, onto the first step in making a paper bag: designing the die cut. This step is where your creativity truly shines. Picture the shape, size, and style you envision for your paper bag. Are you going for a classic rectangular shape, or perhaps something more unconventional? Let’s brainstorm!
- Shape: Consider the purpose of your paper bag. Will it be used for carrying groceries, gifts, or promotional items? The shape should accommodate the intended contents comfortably.
- Size: Size matters! Determine the dimensions of your paper bag based on its intended use. Will it be a small, medium, or large bag? Keep in mind that larger bags may require sturdier materials to support the weight of their contents.
- Style: Here’s where you can get creative! Do you want a traditional flat-bottom bag, or maybe a gusseted bag for extra room? Think about any additional features you’d like to incorporate, such as handles or reinforced edges.
Customization Options for Your Paper Bag
Now that you’ve nailed down the design for your die-cut paper bag, let’s talk customization. This is where the magic happens! With the right materials and techniques, you can transform your paper bag into a true masterpiece.
- Printing: Want to add your logo, branding, or artwork to the paper bag? Printing is the way to go. Whether you opt for screen printing, digital printing, or even stamping, your design will be front and center, catching the eye of anyone who lays eyes on it.
- Handles: Ah, the handles – a practical and stylish addition to any paper bag. Choose from options like twisted paper handles, ribbon handles, or even die-cut handles for a unique touch. Handles not only enhance the functionality of the bag but also add to its aesthetic appeal.
- Finishing Touches: Don’t forget the finishing touches! Embossing, debossing, foil stamping – the possibilities are endless. These techniques add texture and dimension to your paper bag, elevating it from ordinary to extraordinary.
Conclusion
And there you have it – the first step in making a paper bag, along with some exciting customization options to explore. Whether you’re creating custom paper bags with handles for your business or crafting one-of-a-kind gift bags for a special occasion, the key is to let your creativity flow. With die cutting and customization, the sky’s the limit. Happy crafting!
Remember, the success of your paper bag project hinges on attention to detail and quality materials. By following the guidelines outlined in this post and tapping into your creative instincts, you’re well on your way to crafting paper bags that are as unique and stylish as they are practical. So, what are you waiting for? Let’s get crafting!